This post originally appeared in Genius Recipes on Food52.
People do crazy things at Thanksgiving. Whether it’s deep frying a 25-pound bird or stuffing different birds inside one another to make one gigantic feast of a bird—this holiday is consistently epic in the food world. And while I normally cede to more traditional holiday dinner plans, this year I wanted to try something epic of my own.
I wrote recently about hot water crust, the amazingly sturdy pie crust that holds up well to heavy or wet fillings. Even more importantly, hot water crust pies are easy to unmold and so sturdy they can be stacked on top of one another to create a tiered pie. You heard right—move over tiered cakes, it’s pie’s turn.
Mark Weinberg
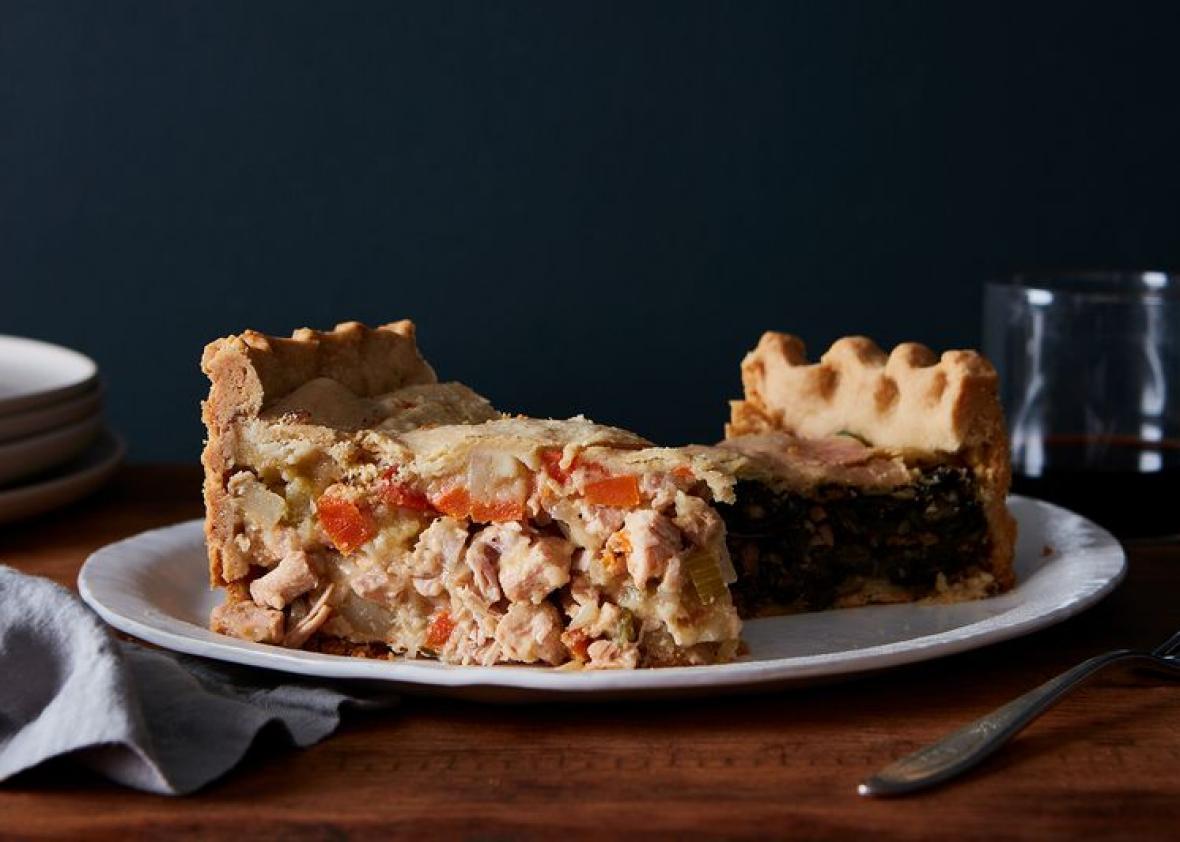
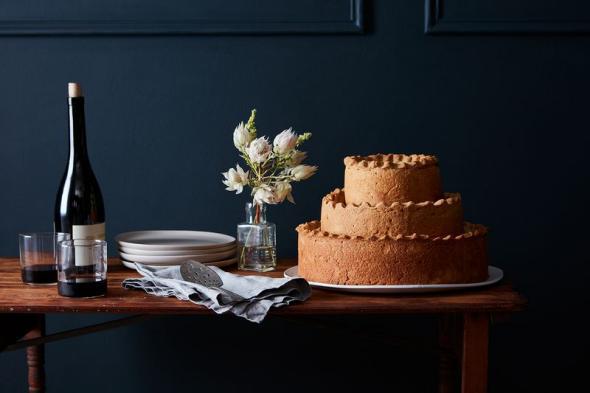
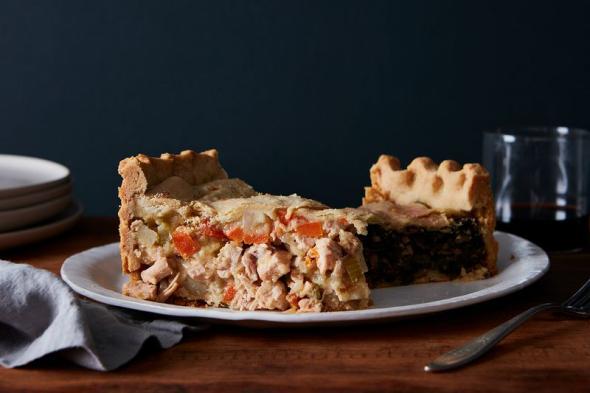
I mulled over a few ideas and finally decided on making a three-tiered pie that’s Thanksgiving dinner all in one. The bottom tier is your turkey—turkey pot pie, to be precise. The next layer is your side dish: creamed kale with pancetta and walnuts, inspired by one of my favorite fall sides that regularly appears on my Thanksgiving table. Finally, the top layer is filled with cranberry sauce. Sure, this project is ambitious, but no more so than making a full Thanksgiving dinner for a crowd. It also requires some special equipment, but, thanks to the internet, you can get your hands on this (and pretty inexpensively, I might add) before it’s dinner time. Plus, this dinner has some benefits of its own, too! The fillings can be made ahead of time (although they don’t have to be), which can seriously streamline your prep on the big day. The hot water crust is easy to work with—you can even opt to press it in instead of rolling it out! Plus, there’s no denying it: This thing’s a show stopper. If nothing else, it’s a conversation piece, perfect for an offbeat Thanksgiving or for Friendsgiving supper. Plus, I can attest it tastes significantly better than a Turducken. All that said, here’s what you need to know:
· Serving.
Mark Weinberg
1. The equipment.
The crust and the filling require nothing more than the equipment you’re likely to already have in your kitchen. But, to build these pies properly, you do need some specific pans. While hot water crust pies are relatively easy to unmold, I prefer to use springform pans. The removable sides make unmolding even easier. Just like a tiered cake, you need different sizes to make the whole tier thing work. I opted for a 12 inch pan for the base, a 9 inch pan for the middle, and a 6 inch pan for the top. (Note: The links provided here are the actual pans I used—they have leak-proof bases and are very sturdy, making them good purchases all-around!) You’ll also need plastic wrap. It makes rolling out the hot water crust a breeze. While you likely have plastic wrap stocked at home already, this project is the time to opt for the largest width roll your grocery store can provide. The bigger the sheets of plastic, the larger you can roll the dough (pretty important for that big bottom pie).
Finally, I’d recommend purchasing a few cardboard cake circles. Putting the pies on the circles makes them easier to move around and gives them a sturdy base for when you go to stack the pies. It also makes it easier to remove the pies for when it’s time to serve. Since you can serve the largest pie from the serving platter you display it on, I only purchased a 9 inch cardboard and a 6 inch cardboard. You can also trace circles onto the cardboard yourself using your cake pans as a guide, cut them out, and cover them with foil or something food-safe.
Mark Weinberg
2. The make-ahead options.
Because the pies will get baked in the oven, you have the option to make all of the fillings fully ahead, if you’re so inclined. This can save a ton of time come feast day when all you have to do is make your crusts, shape, and bake the pies. However, because hot water crust is unlike traditional pie crust, it should be noted that you don’t have to make your fillings ahead if you don’t want to. With a traditional pie crust, it’s important that cooked fillings be made ahead of time so they have a chance to cool before they are added to the crust so they don’t melt the fat and create a soggy mess. But hot water crust must be hot when it’s worked with, which means hot fillings can be added to them, no problem. So, the choice is yours! Just know that even if you prep your fillings ahead, you’ll need to make the pie crusts just before you form the pies.
3. A hot water crust primer.
You can find tons of details on hot water crust here, but I’ll offer a quick review as it pertains to these pies:
· The crust must be made just before you shape the pies. It will only be pliable while it is warm, so have your fillings and equipment ready to go before you begin the process.
· Rolling out the dough makes for more even coverage, and rolling the dough between two sheets of plastic wrap makes it easier to work with.
· If your dough tears when you transfer it to the pan, never fear! Hot water crust can be easily patched and it doesn’t even effect the final look or sturdiness.
· If you have trouble with rolling the dough, you can opt to press in the crust from the get-go, just be sure to work as quickly as possible and keep things even on all sides.
Mark Weinberg
4. The timing.
The best part about this project is it offers some pretty great built-in timing that really streamlines the process. As the pies get smaller, the baking times get shorter, so if you start with the largest pie, all of them will come out of the oven at about the same time. If you don’t make your fillings ahead, make them first. Then start the crust for the bottom pie, fill it, and put it in the oven. Then make the crust for the middle pie and bake. Finally, make the crust for the smallest pie and get it in the oven. (Note: The recipes call for the springform pans to be placed on parchment lined baking sheets. If you can’t fit three sheets in your oven, the 9 inch pie and the 6 inch pie can fit together on a single baking sheet, or you can just place a baking sheet on the bottom of the oven to catch any leaks or drips and place the pans directly on the oven racks.) Don’t be tempted to make all the crusts in one big batch—they won’t stay warm enough while you build the other pies!
Mark Weinberg
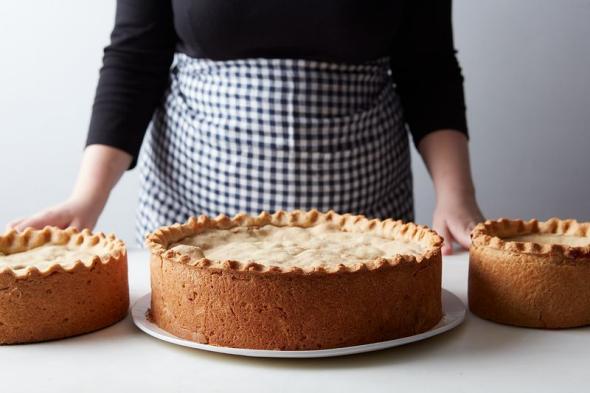
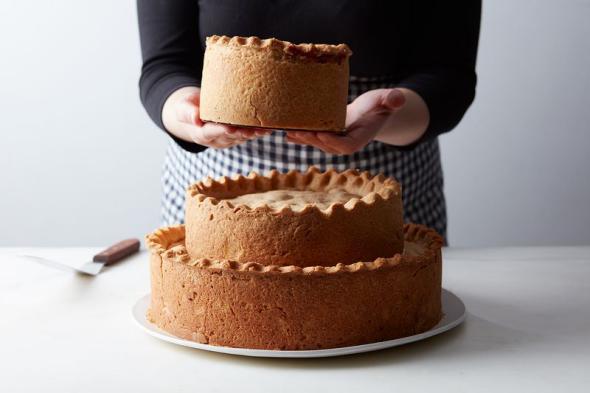
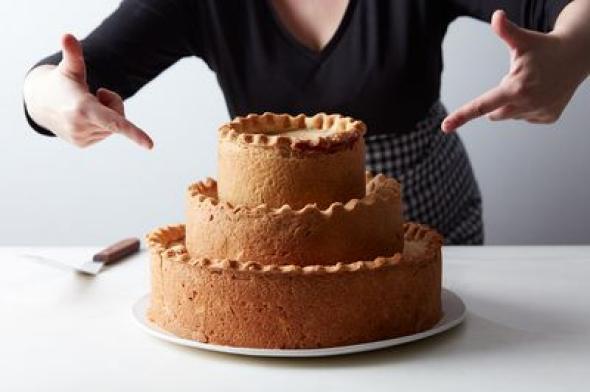
5. The stacking.
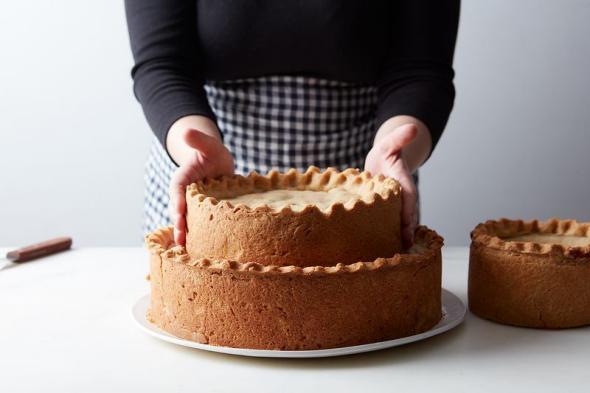
Once the pies are baked, it’s a good idea to let them cool for at least 15 minutes before unmolding. Working on one pie at a time, remove the sides from the springform pan, then slide a spatula all around the base of the pie. Start by placing the 12 inch pie onto a serving platter (do yourself a favor and measure the platter before you try to move the pie!). Place the 9 inch pie onto a cardboard cake circle and the 6 inch pie onto a 6 inch cardboard cake circle. You can even use the circles to help remove the pie from the base of the springform pan by lifting the pie slightly on one side with a spatula, then sliding the cake circle under. Place the 9 inch pie, centered, on top of the 12 inch pie. Place the 6 inch pie, centered, on top of the 9 inch pie. Then parade around your kitchen or dining room like the champ that you are. I mean, these pies are heavy, but do a little Rocky victory lap. You earned it.
Mark Weinberg
6. Serving.
After your guests have oohed and aahed over the majesty of your creation, its time to serve—and it’s actually pretty easy! You can remove the two top tiers right at the table and slice them on their cardboards (or transfer them to platters if you’re feeling extra fancy). The bottom tier can be served right from the platter. Each pie will make about 10 servings – but that’s assuming that the portions for the center and top pies are smaller (like a side dish and a scoop of cranberry sauce). Dive in—then get ready for a serious nap.
More from Food52
The Drinks to Serve Before, During, and After a Feast
The Only Time You Need to Flour and Grease a Cake Pan
36 Creamy, Dreamy Soups to Choose From for the Holidays
The Double Puff Pastry Pie of Your Dreams (Is Easy to Make…
Two Sweet, Flaky Pies That Are Too Pretty to Eat (Like That…