When friends and strangers alike began going crazy for “no-knead bread” a few years ago, I felt like I had woken up in a foreign country. People wanted to make yeast bread at home, but they didn’t want to knead it? This supposed innovation destroyed half the pleasure of making bread in the first place. It was like everyone was raving about “no-imagery poetry” or “no-kissing sex.”
I do not make bread at home in the hopes that it will be better than bread made by a professional baker. (I know, in fact, that it won’t be—although, because I will eat my bread fresh from the oven, it will taste at least as good.) I make bread at home because I want a rich sensory experience. I want to interact intimately with bread dough, feel it respond to my touch, fully witness its transformation from a mess of flour and water into a smooth, resilient orb. Bread means sustenance, communion, hominess, and those associations lose much of their power when a home baker takes a hands-off approach.
Plus, kneaded bread is way faster than no-knead bread. You must start making no-knead bread about a day before you want to eat it. Kneaded bread takes just a few hours, so you can start it in the afternoon if you want to eat it with dinner. (You don’t have to adhere to a strict timetable, though—bread dough won’t suffer if you let it rise overnight and then bake it in the morning.)
The following recipe adheres to a classic six-part technique: mix, knead, let rise, shape, let rise again, bake. Kneading is the only part that takes a little practice to get the hang of—but it’s hard to mess up. (Plus, the exercise is, as previously explained, emotionally rewarding.) The choreography is easy: Push the dough away from you, fold it back toward you, turn it 90 degrees, repeat.
What can be difficult is gauging whether its texture is right. Bread dough should be slightly tacky and pliable enough that it melts back into itself easily when you fold it over. (Visible seams that don’t heal themselves quickly are a sign that your dough is too dry.) As for knowing when it’s time to stop kneading, I’ve picked up two useful signposts from cookbooks and other home bakers over the years. The first: Dough that has been kneaded enough bounces back after you give it a nudge. Second: Dough is ready when it has the texture of a human earlobe. Adopt whichever of these rules of thumb you like better.
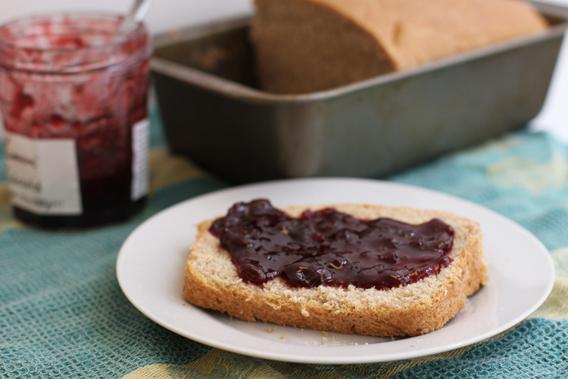
This simple loaf has a buttery crust and a moist, tightly woven crumb. Whole-wheat flour gives it substance and enhances its nourishing vibe, while an equal amount of white flour keeps the bread as light and soft as the rock music put out by its namesake band. Honey provides the merest hint of sweetness, but slices of this bread are equally at home sheltering meat, cheese, or hummus as they are smeared with jam or Nutella. This is American sandwich bread at its very best—and all the better because it’s truly made by hand.
Honey-Wheat Bread
Yield: One 9-inch loaf (about 12 servings)
Time: 3½ to 4 hours, mostly unattended
2 cups all-purpose flour, plus more for kneading
2 cups whole-wheat flour
1 tablespoon salt
2¼ teaspoons instant yeast or one ¼-ounce packet active dry yeast
1 cup milk
3 tablespoons unsalted butter
2 tablespoons honey
Butter or oil for greasing the bowl and pan
1. Combine the flours, salt, and yeast in a large bowl. Put the milk, 2 tablespoons of the butter, and the honey in a small saucepan over medium-low heat and cook until the butter melts. Turn off the heat and add 1 cup lukewarm water to the milk mixture to cool it to 100°F—about the same temperature as the inside of your wrist. Add the milk mixture to the flour mixture and stir to combine.
2. Transfer the dough to surface lightly dusted with all-purpose flour. Knead until it feels smooth and elastic, about 10 minutes, adding just enough flour to keep it from sticking to the surface. Grease a large bowl (it’s fine to use the same one you mixed the dough in), add the dough, and turn it over to coat it lightly with oil or butter. Cover the bowl with a clean kitchen towel or plastic wrap, put it in a warm place, and let the dough rise until doubled in size, about 1 hour.
3. Grease a 9-inch loaf pan. Punch down the dough, then form it into a loaf shape and transfer it to the pan. Cover the pan with a clean kitchen towel or plastic wrap, put it in a warm place, and let the dough rise until doubled in size, about 1 hour.
4. Heat the oven to 350°F. Uncover the pan and bake the loaf for 15 minutes. Melt the remaining 1 tablespoon butter in a small saucepan, then brush it all over the surface of the loaf. Continue baking until the loaf is golden brown and sounds hollow when you tap it with the back of a spoon, 25 to 30 minutes. Let cool for 5 minutes in the pan, then transfer the loaf to a wire rack to continue cooling. Slice and serve warm. (Store leftover bread wrapped in foil or plastic wrap at room temperature for up to a few days.)
Previously in You’re Doing It Wrong:
Peanut Butter Cookies
Blueberry Muffins
Banana Bread
Scones
Cinnamon Rolls
Biscuits
Pizza